.

Showing posts with label cards. Show all posts

Tuesday, August 3, 2010

Stardust Birthday Card #4


This last card is on a 6 x 8 folded base with a 4 x 6 Starry B&T paper over the top. The matting for the right side card is 3 1/2 x 1 1/2 of the Green B&T. The bottom matting is 4 x 2 of the same paper. I edged the bottom mat in Moonstruck first. The bottom sentiment card is 3 x 1 1/2 and distressed in Topiary. I adhered it 1/4 inch from the left side of the mat and centered from top to bottom.


The side sentiment is also distressed in Topiary and measures 3 1/2 x 1 1/2. The 3 squares at the top are all 1 1/2 inches and edged in Topiary, too.
I inked up a Dimensional Element (flower) in Moonstruck and topped it with an Orange button. I added another larger Orange button with a knotted ribbon and a large Outdoor Denim button to complete the collection.
As a final embellishment, I added "Glitz" in dots to some of the sentiment cards as well as the candles and the confetti.

Monday, August 2, 2010

Stardust Card #3

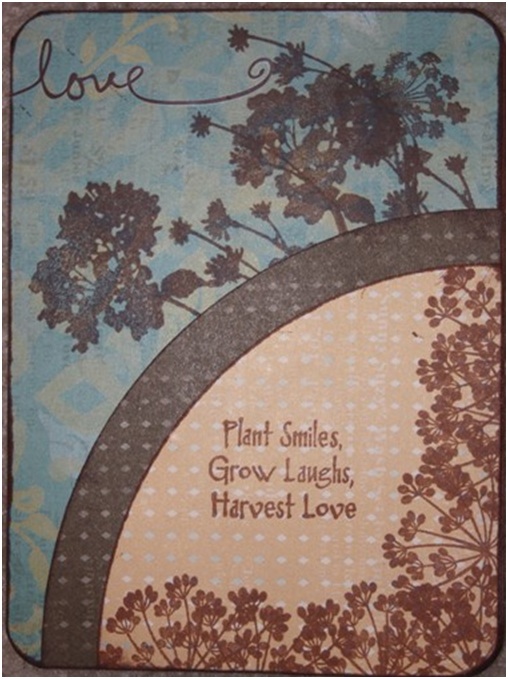
This card seemed a little plain to me, but in looking at it now, I've changed my mind. I can't think of anything to add that wouldn't detract from it. The star B&T covers the card measuring 6 x 4 1/2. The accent piece is the part I tore off for the previous posting, but this time I used the back side. I inked it all the way around and stamped it with a "Make a wish......" stamp before adhering it. I also made it a "pocket" so I could insert my 1 x 2 1/2 inch "You're a star" card. I stamped it in Moonstruck, but distressed it in Topiary. The large sentiment is on a coluzzle cut card. I stamped it first, like last time, with the back-side of the stamp in Crystal Blue and then the front of the stamp in Moonstruck. Once it was stamped, I lined up the coluzzle to follow the stamping and then made a fairly straight cut connecting the two curves. I roughed up the edges with the edge distresser and inked it in Moonstruck before I adhered it to the card. And I made it stand up by using the new 3d foam tape along the sides.

Saturday, July 31, 2010

Stardust Birthday Card #2

With this card, we started with a 6 x 4 1/2 inch base and a piece of the Green B&T of the same measurement to cover it. I used a 3 1/5 x 6 piece of starry B&T and tore it in half from corner to corner for an accent piece. After adhering it all, I inked up all the edges in Moonstruck. The Star Spangled Blue Mat Card measures 5 x 2 1/4 and is sanded all along all the edges. The Sentiment card on top is roughed up with the edge distresser and inked up with Moonstruck. It measures 4 1/2 x 1 3/4. The sentiment can be any large stamp and I started by stamping the backside of the stamp in a light ink (Crystal Blue) first, before stamping the right side in Moonstruck. I love the effect this technique gives! The "Happy Birthday" stamp card measures 1 1/2 x 3 1/2 and is inked in Topiary ink. To finish it off, I added a bow, but to make it easy, I didn't adhere it, I just poked the ribbon through two holes in the top of the card before tying the bow.

Thursday, July 29, 2010

Birthday Cards

Some great folks and I made a set of birthday the other afternoon at a local retirement center. They were pretty easy on the fingers - nothing really tiny or difficult to work with - but they did take a while to finish.


Once we stamped the sentiments (and I used every birthday sentiment I owned!) we distressed both of the sentiment cards with Topiary or Moonstruck ink. The base of this card was a 10 1/2 x 4 card, folded at 6 inches. This left an inch and a half of the inside of the card exposed by the card cover. The celebrate sentiment card is 1 1/2 x 4 and fits exactly over the exposed area.
The card shown has the rest of the cover stamped using Heavenly Blue and Crystal Blue on the Shining Star stamps, but when I made it with the residents, I used some of the Topiary B&T paper from the Stardust set. I also sanded a 3 1/2 x 3 piece of Star Spangled Blue cardstock to use as an accent piece under the square sentiment. I also edge-distressed and inked the square sentiment before applying it to the cover. I added some Glitz and buttons and "bound" the card with some Star Spangled Banner organdy. The ribbon went through both sides of the card and I created a new fold on the front cover.


Thursday, May 27, 2010

Veranda Card #4


I loved making this card, but I have to confess that I was inspired by Kym Glass' layout in an earlier blog article. Search "Veranda" to find her layout.
I can also tell you that her layout was inspired by the cover of the Spring 2010 Close to My Heart Idea Book, so I guess, my card was too!
I started with the stamps from the "Treasure Life" stamp set on the Juniper floral B&T card base. I rounded the corners and then inked up the edges in chocolate brown. The circle parts were cut with the coluzzle and the gold one is about 2 "lines" smaller than the brown one. I stamped the sentiment in the center of the gold page and could also use the circle parts as a pocket if I wanted to.

Wednesday, May 19, 2010

Veranda - Card 3


This is almost an monochromatic card, and it turned out so elegant! I started with the back side of the Juniper B&T (background and texture paper) that showes the same design only in shades of Creme Brulee'. I sponged Creme Brulee' ink all around the 4 1/2 x 6 paper and then edged it again by scraping it in Chocolate ink. I did the same thing to the other paper, a Creme Brulee' diamond design paper that measured 4 1/2 x 3. Then, using Creme Brulee' ink, I stamped several images from the Treasures stamp set, using the large, medium, and small dandilions and the stem. I also stamped the center of the dandilion again using a "fluff" stamp from the same set. I stamped the medium dandilion, without the stem, in chocolate in the center of the large image to finish the effect.
That done, I used the rub-ons to add my sentiment at the top and a design at the bottom of the card. Finally, I threaded 2 strings of Chocolate waxy flax through a green button and, spreading out the strings, taped them down on the backside of the card. I didn't want the ugly strings and tape to show, though, so I added a spare piece of cardstock to the inside cover of the card, adhering it with the same 2-sided tape that I used to stick down the strings.

Monday, May 17, 2010

Veranda - Card 2

I LOVE using the Rub ons that Close to My Heart makes. They are so easy! For this card, I used a 6 x 3 inch base from the Juniper floral B&T (background and texture paper). Before I stuck it down, I used an ornate corner decor-punch. I used the punch again on my gold-diamond B&T card that measured 2 1/2 x 2. Finally, I added a 1 x 6 inch piece of the backside of the Juniper B&T as a strap across the card. I sat a little more than a 1/4 inch from the bottom of the card. All of the pieces were inked up in Chocolate by scraping the edges across the ink pad. I used Copper Brads to tack down the strap and added some punched flowers and a button to finish off the design. The "Memories" sentiment was a rub-on as well as the swirls along the strap. Both were from the Love Story Rub-ons by Close to My Heart.

Sunday, May 16, 2010

Veranda Cards


I'm making cards for a class that I have every month at a retirement center. Since I don't open these classes to everyone, I wanted to offer the designs to you. I had a lot of fun making them and especially love the way the Veranda papers work for these designs.
This card is 6 x 3 and I used the back of the floral juniper B&T (background and texture paper) as the base for the card. I used a 6 x 1 1/2 inch strip of the front of the B&T as the paper accent here and anchored it down with brass brads. I tied a Juniper ribbon around it and then set on the daisy accent. For this I used a white "Just Blooms" flower that I inked up in Creme Brulee'. On top of that I added the back side of the diamond paper, the brown side, in a circle and another circle punch with the yellow side showing. On that side I stamped my sentiment - done and super simple!!!

Wednesday, May 12, 2010

Heart2Heart Challenge - Techniques


This week at the H2H Challenge blog, they asked the question, "What technique inspires you?" For me, that's "Rock-n-Roll" stamping, without question. It's a technique that is SO easy with the Close to My Heart Acrylix stamps and the effect is awesome!

On my entry, I used a retired stamp set that I just can't part with, called "Skeleton Leaves," but the technique is easier to see with my sample pictures using another retired set, called "Nature's Vein."

First, I stamped my image in a light color; I used Creme Brulee'. Then, after cleaning my stamp off, I used Bamboo to restamp the image, but this time I rocked the edges of the stamp into the ink. I made a point to leave the center of the image clean of this new color and also "rolled" the stamp so that as the ink got closer to the center, there was less of it. I stamped it directly on top of the first image, giving my artwork a slight two-toned effect. It harder to see in the pictures, but there was a definite "glow" to the center of the leaf.

After cleaning the stamp again, I used Smokey Plum for the final accents. I used the same method of rocking and rolling the stamp into the ink, but this time my goal was to collect just a little of the edges of the stamp.


Here is another example using the "Skeleton Leaves" stamp set. On this one, I used Sunflower ink as the first stamp, Autumn Terra Cotta as the second stamp and Cranberry as the final one. I love how this techniques creates a finished image!

Wednesday, March 17, 2010

Happy St. Patrick's Day!


I got a sweet card from Cynthia. She is such a gem! And this card is - yes - stinkin' cute! Notice the brads and the shamrocks match perfectly. I just LOVE that about Close to My Heart things. The papers are the exact color of the inks and thoroughly match the accents and markers as well. Even the design paper (we call them Background & Texture papers or B&Ts) has the same colors so that everything matches perfectly. No hunting around for paper that comes close!
The shamrocks also use our sparkles in the center. Oh and around the edge, that's not actual sewing that you see. That is a stamp from the set called, "Simple Stitches" and you can see it by clicking on the highlighted name. It has other stitches, as well, like the zigzag stitch, and a couple of sentiments including: "I'm sew happy!" You can't tell it from the view, but the little man and the sentiment are both raised - the sentiment higher than the man - using 3d foam squares or pop dots. It's also a little hard to tell, but the little man looks like he was colored with chalks or water-color pencils. Especially on the pants, it looks like a blending pen or water brush were used to create a faded look. Cynthia is quite the artist with this technique. Do you notice how the man's hat is darker along the bottom and has a lighter color (almost like a shine) along the upper part of the brim? I'm thoroughly impressed and grateful for such a talented friend who doesn't mind me sharing her expertise!

Friday, February 12, 2010

Valentine Cards!

I made these cards for a workshop that I did at a retirement center, so I made sure they were REALLY easy to put together. I used paper from the "That's Amore'" paper pack and used my Cricut to make the cut-outs and accents.


On this card, I cut out the sentiment with my Cricut, but I lined the back of it with double sided tape. Then I just rubbed Prisma Glitter across the sticky cut-out. A note here, if you've never used Prisma Glitter: it is not a glitter that needs to be poured. You can really save it if you just dab your finger into the bottle and spread it across a tacky surface. I used to use it with the Write and Rub pen, but my pen wouldn't always work correctly. I would love to find a stamping ink that would stamp wet, but dry tacky. Wouldn't that be a great look!

On this card, I used the Hollyhock ribbon and Desert Sand paper to finish off the card.


This card took the "All My Love" set for the sentiment, but I used the "Love Language" set to apply the pattern on the card under the sentiment. The pattern is in Blush ink and the sentiment is in Hollyhock. The flourish is again a cut out from the Cricut, but the Dimensional Elements set called "Fresh Shapes" would work really well with this card!


The more I look at this card, the more I'm sure that I'm just not finished with it! I think I need a cute sentiment in Chocolate in that open space on the pink print!


This last card utilizes the back side of the chocolate print paper. The back of it has the same print, but in a monochrome scheme. I distressed the sentiment card with some scraping using Blush ink and the sentiment, from the "All My Love" set, was stamped in Cranberry.

Thursday, February 11, 2010

Valentine Card!


This is an awesome card and I'm so grateful that Cynthia Smith shared it with me! The front is embossed in both black and red using the Soul Mates Word Puzzle. The band on the inside is also from that set. I'm not sure where the other images came from although they look familiar. She also added the scripture Matthew 6:21 to the card. I LOVE adding scripture cards! Anyway, I thought maybe you could use some inspiration as you work on your Valentines!

Monday, August 31, 2009

Christmas Card Workshop - November 28; 10 AM

This workshop will be completed in only a couple of hours and you'll leave with 8 hand-made Christmas cards that are easy to re-create. Email me with your desire to participate in this workshop and follow up with pre-payment so I can order your supplies. The supply fee for this workshop is only $7. That's less than $1 per card!

Monday, January 12, 2009

"That's Amore'" Acrylic Album and Valentines

I'm holding a workshop for the hot Acrylic Albums by Close to My Heart!

This workshops uses the elegant new CTMH paper pack called "That's Amore'," along with the matching stickease, and the "Love Story" Rub-ons.

The workshop will be held on February 8 beginning at 5PM and
we'll also include 10 Valentines to use up the rest of the paper pack and stickease.

This workshop is $45 plus tax and shipping and pre-payment is due on January 23rd.


Friday, December 12, 2008

Double Flap Card

This card is set up sort of wierd. I cut the base 4 1/4 inches wide, but only 9 inches wide. The fold is 3 1/4 in from the left edge of the front. You can barely make out the edge of the card in this first picture. I cut a piece of the Everlasting B&T 6 x 3 and folded it in half to make the second flap of the card. I adhered that folded card on the inside of the base so that the 3 x 3 "mat" would be in the center of the card and the fold was on the right.
The artwork is on a 2 inch square card, mounted on Cranberry 1/4 inch larger (square), on White 1/2 inch larger, and Cranberry again 3/4 inch larger. So the measurements are, respectively, 2 1/4 square, 2 1/2 square, and 2 3/4 square.
The main artwork is a montage of stamps on a 2 x 2 block. I used Christmas Scripts, December Word Puzzle, Ho Ho Ho, Holiday Jubilee, and Shining Star and my final of this card actually had a much fuller look to the main artwork as I kept adding stamps. The sentiment inside is from Peace On Earth. If I had it to do again, I think I would put the first part of the sentiment on the white flap under the artwork flap and then add the rest of it, as is, on the inside of the second flap.

Wednesday, December 10, 2008


This card was also inspired by some I saw on a bulletin board, but there were several that looked the same so I couldn't pinpoint just one person as the originator. Frankly, I think it is an Originals design. Have you used that? They make directions easier to follow than mine and offer diagrams so you can see exactly what you are cutting and what you're going to do with it!
For this card, I used Aspen paper (LOVE IT!) along with some words from the "December Word Puzzle" (stamped in Outdoor Denim with the cards distressed in the same.) The background for it was stamped using one of the "Jingle Borders" in Juniper and I love the way those colors go together!
This card goes together quick and easy!

Tuesday, December 9, 2008

Stinkin' Cute Snowman Card!

This card was inspired by one created by CTMH consultant Laurel Seabrook, but mine turned out totally different from hers by the time I was through. First I started with the Christmas Memories snow man which is a "two-step" or "base-n-shade" stamp set. First I stamped the shadow of the image, then I added his scarf and hat fill-in. No I didn't match up the gaps perfectly, but it didn't end up mattering. Once I have the shadow and the fill in, (in Juniper and Moonstruck, respectively) I stamped the outline of the snowman in Outdoor Denim. I also stamped the "White Christmas" from the Holiday Jubilee Stamp Set in Juniper. After I finished this stamping, I cut out the snowman (making his arms a little thicker than the single lines that they are) and cut the "White Christmas" in a square.

Once I finished the main artwork, I began working on the background. I stamped the trees on a white 3 1/4 x 2 3/4 card, using the 3 trees from the December Word Puzzle stamp set. On my block, I put 2 together and 1 off to the side. I stamped them all in Juniper.


I used the same basic idea with the snowflake background on the Twilight paper. I put the snowflakes on the block in a non-patterned manner and turned it with every impression (in Juniper) to give it a fully random look. Since I'm covering the center, there was no need to stamp there.

The Twilight 5 x 3 3/4 cardstock covers the 5 1/2 x 4 1/4 base. I layered a 1 x 3 3/4 Outdoor Denim strip across the Twilight.
I stacked a 3 3/4 x 3 1/4 piece of Moonstruck Cardstock and then put the white tree stamped card centered on that. I mounted my sentiment on a Twilight piece just a little bigger than the sentiment, and adhered my snowman using 3d foam squares. Once he was set where I wanted him, I trimmed off the extra bit of him at the bottom, but some of the gals at my workshop left him whole. I used a snowflake punch from the Martha Stewart collection at Walmart and some glitter foam paint that I found at Hobby Lobby for the final embellishments.


Monday, December 8, 2008

Unique Christmas Tree Card


This card looks so elegant, but it was SO simple to make. I can't take credit for it as I found the exact design on a CTMH consultant board, but I don't have the name of the consultant in my file. That's not like me and I'll try to update this posting with the proper credit if I can.

Just a note here: I love the way the consultants in this company are so willing to share their ideas and inspiration with each other. I've gotten SO much from my CTMH sisters, especially in my often non-creative times. I find I can brainstorm variations, but can seldom dream up a design from scratch. The best way to thank those who have inspired me is to give them full credit for their creations. Sort of like virtual applause! So even though this card is mine, the brainchild belonged to someone else and I'll tell you who as soon as I can!


Evensong is the paper pack I used. The green mat for the artwork is actually the Evensong Creative Basics, but since that is no longer available, the green print from the regular Evensong pack works just as well. This card starts out as paper punches. I used a circle punch from the Martha Stewart collection. (Walmart) I punched 5 from the red along with one of the stars, and 3 from the green print. I used them all upside down except for 3 of the greens and the star on top. I only used one stamp set with this card - the December Word Puzzle. LOVE THAT SET! I stamped the Noel in Chocolate. I stacked the circles above the Noel on a 3 x 4 card which I stacked on a Creative Basics green paper measuring 3 1/4 x 4 1/4. I covered the entire cardbase with a 5 1/2 x 4 1/4 piece of the red print. Then I embellished with a few sparkles, a Holiday red bigger brad, and the circles (also from the December Word Puzzle) stamped in Tulip.

Okay, now that I've finished the instructions, I searched through the CTMH bulletin board and found the consultant who created the design. She is Lisa Aquino, a Canadian CTMH consultant.


Sunday, December 7, 2008

Snow Guy Double-Flap Card

This cute little card is worth the effort! I had never thought of stamping on design paper, but it turned out great! Use the "All Decked Out" Stamp Set. To make this, you will need to stamp all of these parts onto white paper, except the hat and scarf. Stamp the medium circle about 1/3 of the way up from the bottom of a 3 x 4 card. You'll stamp the swirly stamp along the bottom of the medium circle, all the way across to either side of the snowguy bottom. Fill in with the swirly, but make sure you turn the stamp from time to time so all the swirls won't look exactly the same.


When you stamp the scarf and hat on the design paper, cut it out, removing all the extra swirly stuff. (I don't want to spend all that extra time cutting, do you?) Stamp the smallest circle on an edge of the white paper and add the face in black. Cut it out completely. Cut the medium circle out, too, only cut the circle up to the swirlys and then along the top of them. (See the card for the full look.) I started the card with a 4 1/4 x 5 1/2 card base, and centered it with a 3 1/2 x 4 1/2 plaid piece. I cut a white cardstock piece that measured 6 x 4 and folded it in half to make it 3 x 4. This piece I centered on the plaid, closer to the top edge. I covered it with a Twilight cardstock piece that measured 3 x 4. The cut snowman bottom and swirlys go at the bottom of this Twilight piece. The snowman head will go above the body, with about 1/4 inch of margin between the two circles. Put the scarf and hat in good positions over the head.

At this point you will want to add your sentiments. I used the "Peace on Earth" stamps. I actually cut the sentiment into pieces to make it fit this way. I stamped this section inside the 3 x 4 card that is sitting on top of the plaid paper. The second part of the sentiment was left in tact and I stamped it on the inside of the cardbase.

I finished the card off with a Autumn Terracotta photoclip that holds the 3 x 4 flap closed.

Wednesday, December 3, 2008


What a simple card. Special thanks to consultant Tiffani Hughson for sharing this design! The red is stamped using White Daisy with the "Jingle Borders" stamp set. The green and red cardstock start out as 5 1/2 x 3 1/4. I created a template with another scrap of cardstock and then cut both the red and green at the same time with one stacked on top of the other. That way, even if my curve wasn't perfect, it would still have a parallel look to it. I used the two ornaments from the December Word Puzzle stamp set and embellished them with chocolate Waxy Flax and free-hand black lines. Would love to see your take on this card! Please post it in the comments!