.

Showing posts with label Mistletoe. Show all posts

Sunday, January 30, 2011

Mistletoe Workshop Layout #5

This is the layout that actually came in the brochure with the Mistletoe workshop. I hope you will order it before they are gone forever. Even if it's February already, go ahead and call me! I MIGHT be able to get the workshop kit, still.


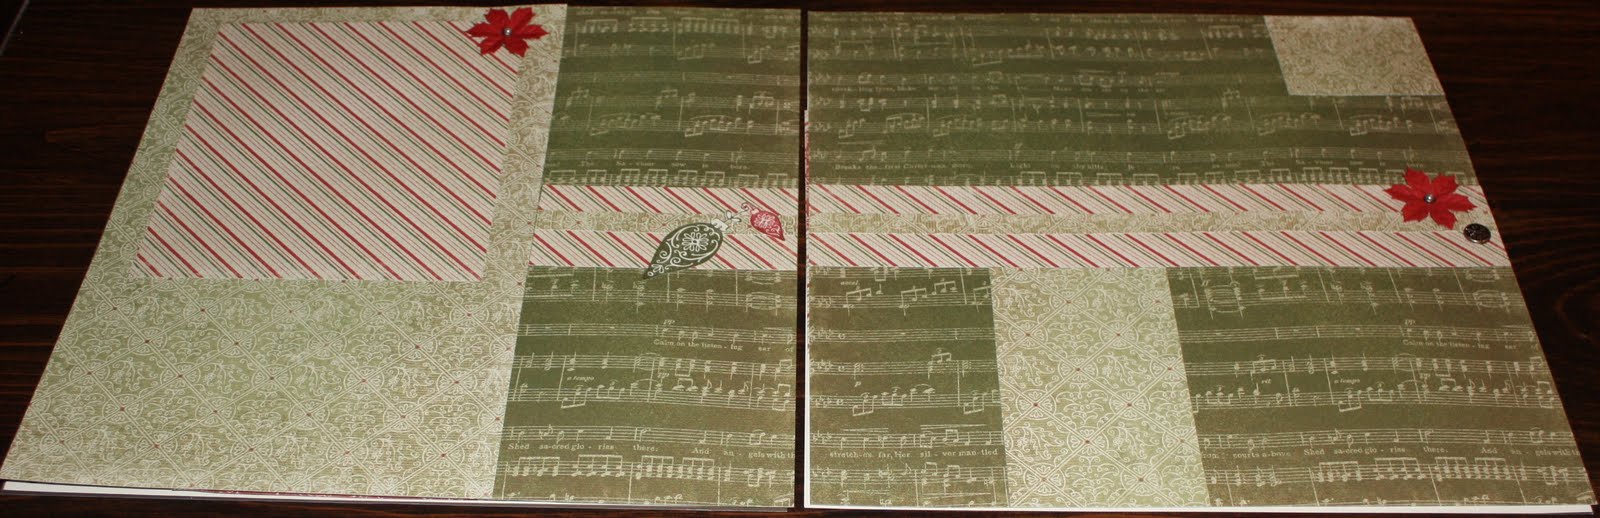
This is one CUTE double, but again, I must confess to some instruction altering. See the large holly paper section at the top of the left page was actually supposed to be a large picture (9 inches wide). Now I don't know about you, but I don't print out pictures that big and I don't REALLY want too many of them in my book. In fact, with 4 kids, 3 nephews, and 1 niece, I prefer to have MANY little photos to save the memories - since that's what I have such a bad time with - instead of one big photo with lots of details. So, I cut a 9 x 6 of the paper instead and plan to house 2 to 4 smaller photos in the space instead of a great big one. As for the blank area on the right, that is for three 4 x 3 photos in a row. Not sure if I'll do that, or a 4 x 6 and then a smaller one.

I really like the embellishments in this one, though. The kit comes with the Mistletoe brad set that includes the poinsettias, the pretty green framed brad that you can see and the etched pewter brads. I added to the texture by raising a couple of the stamped images up just a bit. And the ornament in the center of the title card will be the letter O whenever I figure out what I'm going to say. "Joy comes in the morning" or "So much fun." The brochure says, "SNOW much fun," but it just doesn't usually snow around here at Christmas and this year was no exception. Maybe I'll make it "O Christmas Tree."
If you want this set of the Olivia that I've shown, today is the last day to order it! Email me!!!!

Friday, January 28, 2011

Mistletoe Workshop Layout #4

I'm pretty musically oriented, so I LOVE this paper and I wanted to make sure that plenty of it would be seen so I chose a layout with a lot of the base page open. This one is called "Mesmerize" and it is only page 34 of Magic, Although I changed it just a bit - go figure??? Really it was a tiny change. The 3 x 5 piece of green print B&T was really smaller in the pattern to make way for a 2 1/2 x 3 picture, but I thought I might put a 4 x 6 across the "crack." That is, I'll cut the picture (in a non-essential place) and divide it between the two pages with the musical matting around it. I didn't really want a picture to be part of the boundary for the matting, so I lengthened the green print to complete the edge.

I decorated this with just a few accents, a couple of stamped, cut out images and 2 poinsettia brads with a pewter brad seemed all that was needed. I'll probably move the ornaments to the bottom corner and use that center stripe for the titling of this page.
This layout can hold a TON of photos! I'm thinking: one in the candy-stripe mat, another small one below it, a 2 1/2 x 3 inch pic on the right side under the green print in the corner and two more of the same size or a 3 x 5 tall one next to it. A 4 x 5 in the blank spot next to that and another one in the bottom right blank spot. Add the divided 4 x 6 in the middle, and that accommodates 7-9 photos easily! I wonder if I have enough pics of my kids caroling???

Thursday, January 27, 2011

Mistletoe Workshop Layout #3

Now this layout is just plain and even a little boring, but try to picture the right hand page with a 4 x 6 photo about the journaling card and a 3 x 3 photo under the diagonal stripe. Then picture a title across the top of both pages and either some extra 5 x 4 photos along the right side or more journaling and a picture at the bottom. Then on the left hand side goes one 6 x 6 picture or two 6 x 3 pics. Another 3 x 3 goes next to the candy strip and a final 6 x 4 goes under the green print B&T.

I know that's a lot to imagine and without the pictures, this layout just isn't done any justice, but it will look awesome when it's done! It is called "Love Potion" and can be found on page 18 of the Magic book although I altered it a little. The pattern calls for the two 4 x 6 pics that are on the inside of each page to be right next to each other. I didn't like the way that looked as much so I pulled the Colonial White journaling cardstock down to the bottom of the grouping. Once the pics are on, I'll stamp the outline of the groupings, but I didn't want to do that ahead because I may be adding extra pictures. Boy, I really need to get some pics printed!

One last item is the little pocket at the top. This can be used as a souvenir pocket, but I think I'll position some cropped pics and stamped ornaments spilling out of the pocket. Don't worry, I'll repost this one when I'm done with it. Probably after my retreat in February.


Wednesday, January 26, 2011

Mistletoe Workshop Layout #2

This layout is called "Showtime" and the instructions for it are on page 106 of Magic. I didn't have to make any changes for this layout. It was perfect just the way it was! And I love the way these papers go together for this layout. It's almost too much, though so the only stamping I did was the "Noel" in the bottom-left and top-right.

The only other embellishment on this page is the white poinsettia brad in the bottom left corner. This double is begging for pictures, but it just doesn't need anything else!


Tuesday, January 25, 2011

Mistletoe Workshop Layout #1

This layout is called "Performance" and all basic instructions for it are on page 48 in the Magic "how-to" book by Jeanette Lynton, the founder of Close to My Heart. Something I love about this program is the pattern CD that is included with the books. I used them for the parenthecal patterns on the bottom of the left page and the side of the right page.

I adjusted the left hand side of the page. The 4 1/2 x 7 piece of green print B&T was actually only 1 small B&T and a 2 inch open space. I didn't like the way it looked on this page, so I filled in the open spot. Also, the original layout called for 1/2 inch border all the way around each page. But I thought I might use the open brown section as a mat for my pictures instead of filling them in entirely so I moved both pages to where they would meet in the middle of the layout.
For the decorations, I random stamped (using 2nd generation stamping) on the right side card and added two cut out ornaments and a poinsettia brad that came with the set. For the left side, I just added the one cut out ornament. I raised all the cut-outs on 3D foam squares. Finally, I added some "stitching" with my Cocoa marker along the parenthetical edge of the two cards.

Tuesday, January 18, 2011

Olivia, Mistletoe, and Hooligan Workshop Sets Will be Gone at the End of the Month!

This is just one of the Olivia layouts that I'll be posting and giving directions for in the next few days. This is one of the most beautiful sets I've worked with and I highly recommend it! The kit comes with a stamp set that was created especially for this workshop and it also includes the shimmer brads in bronze, silver, and gold. The set is only available through the end of the month. Contact me this week if you want to order it! See the flyer for the workshop and another example HERE.


These layouts were made with the new, traditional Mistletoe set. This set makes some BEAUTIFUL layouts and it again comes with a set of embellishments (Mistletoe) and a stamp set created for the workshop. Both of these sets come with a full-color brochure, by the way. But like the other, the Mistletoe workshop kit is only available for the rest of the month of January. See the workshop flyer and another example HERE.


Hooligan was also a fun workshop, but I don't have any pictures of it. However you can see an example of it on the flyer HERE. It, like the others, comes with a special stamp set and a set of embellishments as well as a color brochure.