
These two layouts were part of a challenge from one of my customers. See once we're done with the workshop, she pulls out some extra cardstock and uses the scraps to make some extra layouts. (Yes, she's very creative!) So I wanted to use more of the paper so she wouldn't have to come up with design ideas herself. And voila! These layouts came out.
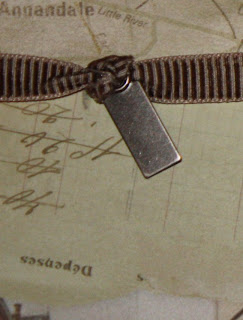
I started with a 6x10 of the map paper on the left-hand page and a 2x6 of the postcard paper along the bottom of it. Then I used a 6x12 piece of the stripe (cut with the strip, vertically) for the other side of the paper. On the edge of this, I put a 1x10 of the postcard paper, leaving 2 inches of the stripe at the top showing. I then cut a 5x2 piece of the postcard paper that lines up in the center of the layout, flush with the edge of the map paper. A 13-inch ribbon with a pewter slide stretches across the page at the bottom of the 2-inch section. The other ribbon is described in depth below.
The right page starts with 2x12 strips of map paper, brown cardstock, and stripe, all lined up next to each other. A 6x6 pocket of the brown B&T makes up the bottom right of the layout. For the top right, I used a 6x6 piece of map paper and a 5x5 postcard cut as a mat on top of it.
 I used more of the brown B&T as a tag in the pocket and added a pewter hinge at the top to keep it from falling into the pocket. The general measurement of the tag is 3 x 5. A ribbon is stretched from top to bottom of this layout and a 1x3 piece of postcard adorns the top of the pocket.
The ribbon at the bottom of the left-hand page is knotted on the right side and the resulting loop is slipped over the side of a spiral clip. That clip is then attached to the layout with a brad, like on other pages.  I tied another knot around a photo clip and then wrapped the end of the ribbon around the left side of the layout to complete the design.
 I tied another knot around a photo clip and then wrapped the end of the ribbon around the left side of the layout to complete the design.
 All-in-all, I was really pleased with this workshop. I used almost all of the paper in the set and ALL of pewter embellishments along with most of the ribbon. I was really pleased with the results of the effort.


No comments:
Post a Comment