 We're going to keep working on
  the project that I started last Tuesday. Last week, we roughed up a stamped red cardstock and tore all the edges. This time, we have a cardstock of the same color, but 1 1/2 inches wider and longer. When we're done with this, it will look like a mitered frame, but to start you will need to cut the cardstock horizontal, from corner to corner. Once cut, hold the pieces together and cut it again across the other two corners.
 This will make 4 symmetrical sections to your rectangle.
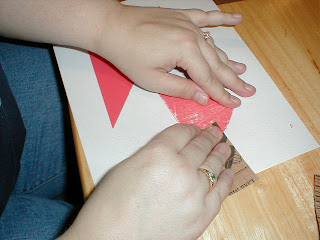
You'll need to have coarse sand paper for the next section. You will sand each of the sections separately. The top and the bottom should be sanded from right to left across the hypotenus (large edge) of the triangle. The two sides of the rectangle should be sanded from the base, directly across the cardstock. Be sure you don't sand from the outside corners to the center corner!


Use a white piece of cardstock that is exactly the same size as the red piece you are working on. Using your Tombow adhesive, spread a line of glue on each outside edge of the card with a cross down the middle.
Place your rectangle pieces on the white cardstock, meeting all the sides evenly.

When you are finished, and put your rectangle together, all the sanding lines should be going the same way.

Please excuse the 2 or 3 lines on the right side of this piece. It was the first piece I sanded and I accidentally sanded toward the point instead of directly across the cardstock.
The finished product is below. I used the Birthday Bash and the Card Sentiments stamp sets to complete the card.


No comments:
Post a Comment